What is inside a trade when I click on it?
Four tabs — Chart replay, Snapshot, Trade details and Notes. Replay animates the move, Snapshot holds your images and video, Trade details holds the numbers, and Notes is where you write what you learned.
The row in the table is only a summary. The detail panel is where the trade actually lives, and it is worth knowing what each tab is for rather than clicking around hoping.
- Chart replayThe real market around your trade, played back. It pulls the historical bars for your instrument and marks your entry and exit on them. It is not a recording of your own screen — for that you want a clip on the Snapshot tab.
- SnapshotThe evidence: screenshots you attach or that get captured automatically, and video clips if you are running the desktop companion. This is also where you mark images up.
- Trade detailsThe numbers and the market context: entry, exit, stop, size, fees, and the fields describing what the market was doing.
- NotesThe writing: what happened, what you would do differently, and the emotion and mistake tags that the Psychology analytics are later built from.
A rough rule for which you want: Snapshot and Notes are where you put things in, and Trade details and Chart replay are where you look things up.
Step by step
- In the Journal, click anywhere on a trade's row. Either view works — the rows behave the same whether you are in the day-grouped view or the single flat list, so you do not need to switch back to reach a trade.
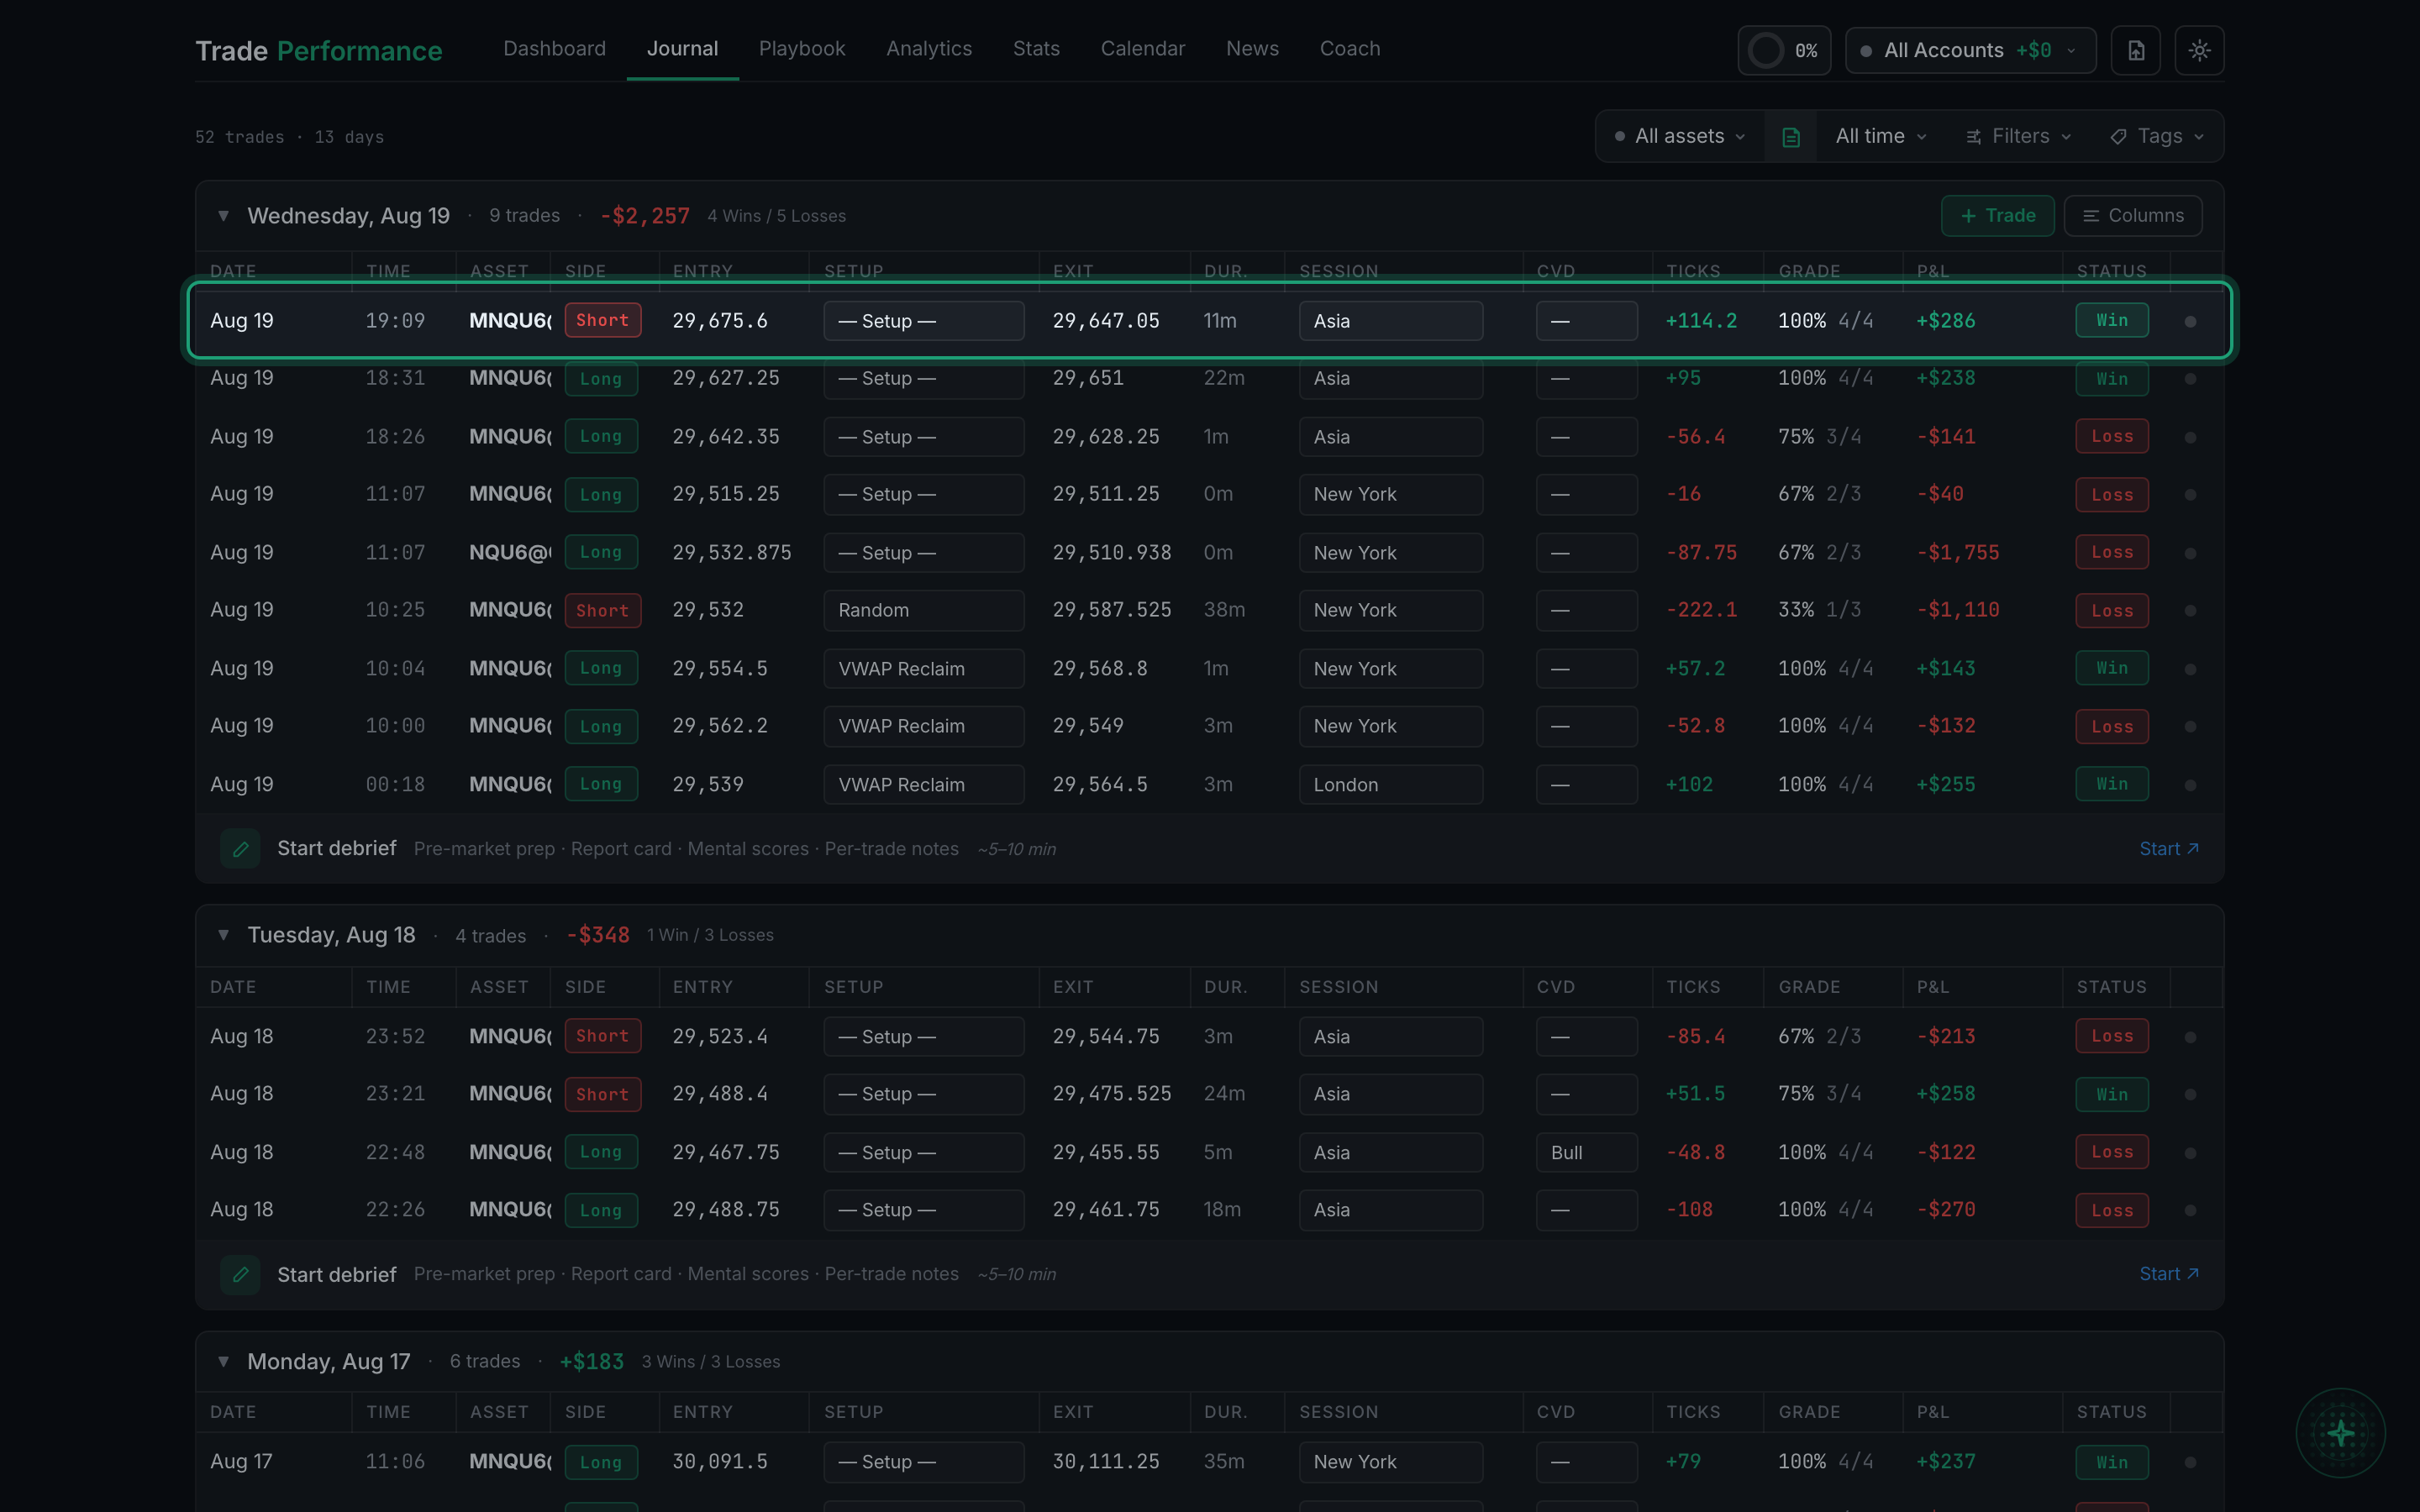
a trade row in the Journal, highlighted, ready to click - The panel opens directly underneath that row. It opens on the Notes tab, because writing something down is the most common reason to open a trade.
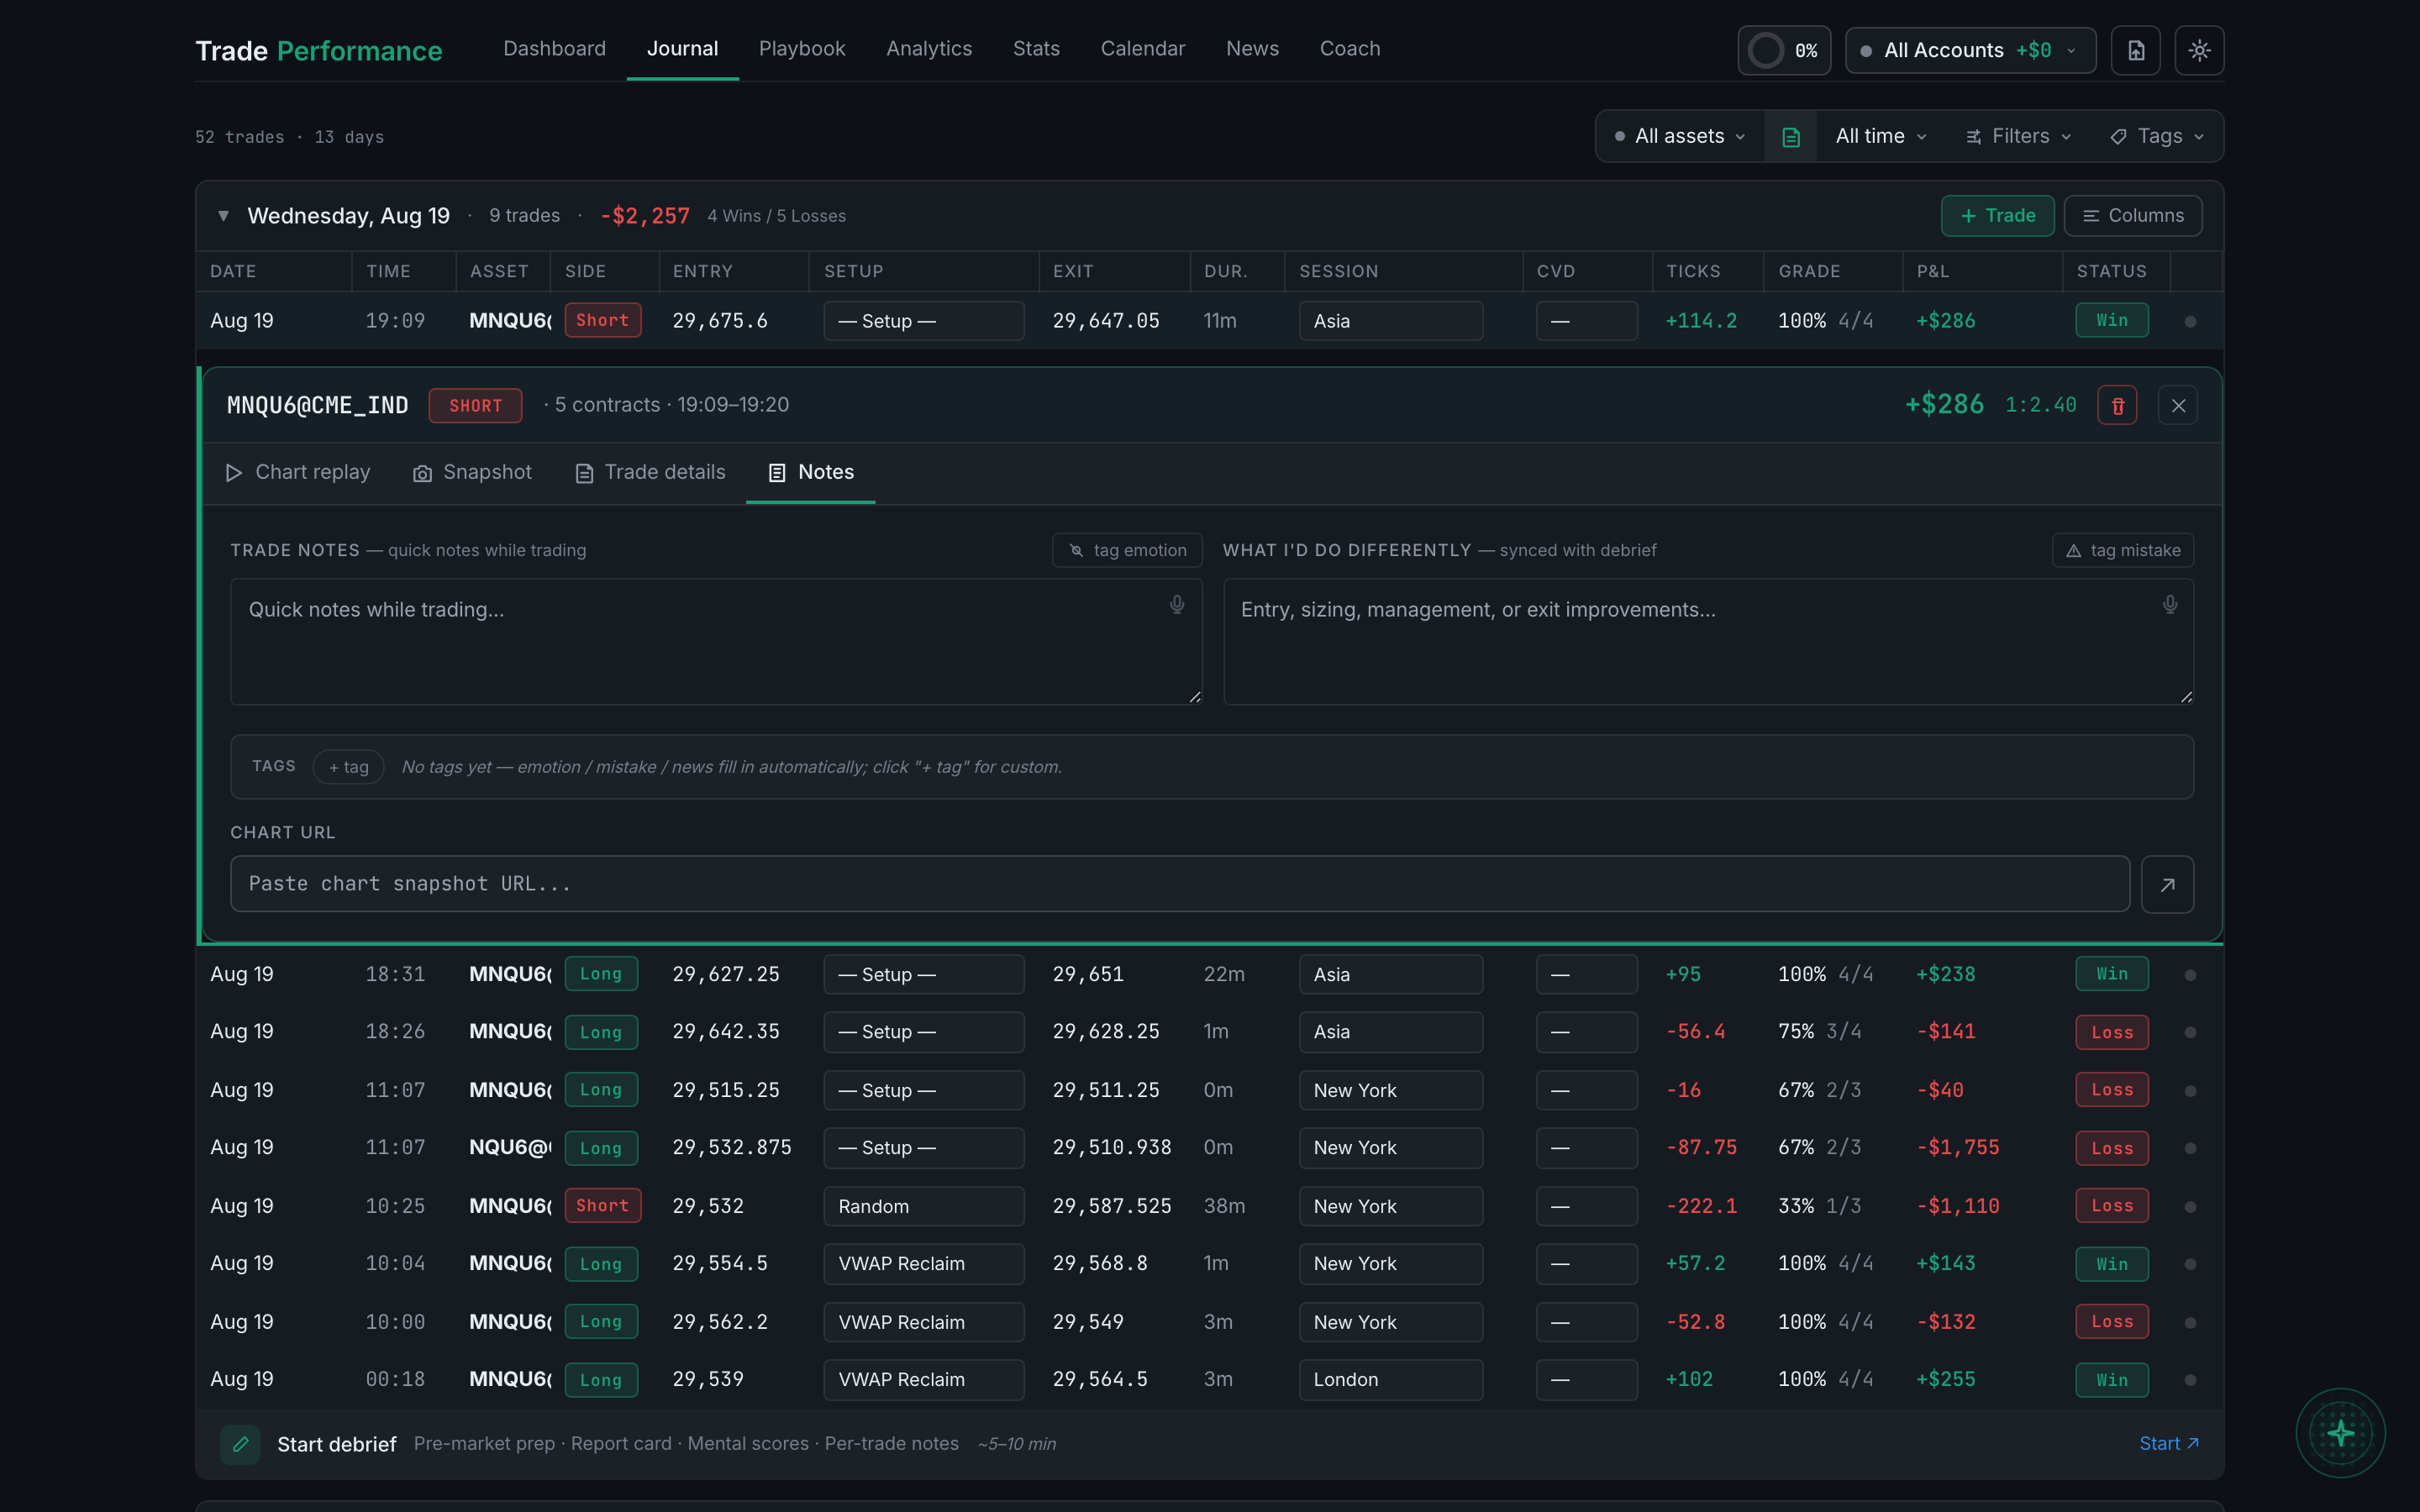
the trade detail panel open on the Notes tab, showing all four tabs - Across the top of the panel you also get a summary of the trade — the instrument, the direction, how many contracts, the times you were in, the profit or loss, and the risk-to-reward you achieved.
- On the right of that summary are two buttons: a red trash icon that deletes the trade, and an × that closes the panel. Clicking the trade's row again also closes it.
- Click any of the four tabs to switch between them.
Each tab has its own guide below.